Tampilkan postingan dengan label Photoshop. Tampilkan semua postingan

Tutorial Photoshop : People Zebra

Minggu, 22 Agustus 2010
0 komentar

Langkah1
Create a new document and place the photo, you can download the one I used at: Photo 1 .
Buat dokumen baru dan tempat foto, Anda dapat men-download yang saya gunakan di: Foto 1 .

Step 2 Langkah 2
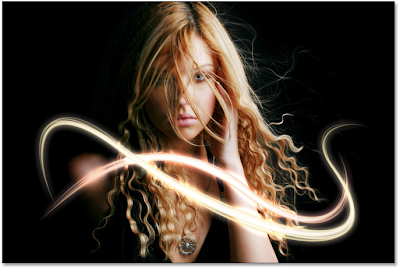
Here I placed a second image. Di sini saya menempatkan gambar kedua. I will use it to create the light effects. Aku akan menggunakannya untuk menciptakan efek cahaya.
Here is the link for the next image: Photo 2 .
Berikut adalah link untuk gambar berikutnya: Foto 2

Step 3 Download aja PDF dibawah ini, panjang soalnya lw untuk dijadikan posting. Lebih Praktis Lagi :

Lihat Hasilnya pada gambar yang berada DIBAWAH INI  :
Download Tutorial PDFnya : Download File
Baca selengkapnya »

Tutorial Photoshop : Seleksi Photo

0 komentar

Channels : digunakan untuk pemecahan warna, dalam tutorial ini saya gunakan untuk memisahkan warna rambut dengan warna background. Level : mempertegas pemecahan warna Path : seleksi bentuk bebas, digunakan untuk menyeleksi bagian tubuh Langkah yang akan kita lakukan:

1. Open file gambar yang akan kita edit : FILE > OPEN > Pilih gambar > Klik OPEN Untuk contoh saya menggunakan gambar di bawah ini.
2. Tampilkan channels untuk memulai pemecahan warna WINDOW > CHANNELS > Pilih warna yang paling kontras antara detail rambut dengan backgound > KLIK KANAN > DUPLICATE CHANNEL.
3. Atur level warna agar terlihat jelas antara batas rambut dan background IMAGE > ADJUSTMENTS > LEVELS : atur seperti gambar dibawah ini atau atur sesuai dengan keperluan. Usahakan garis batas tangan dengan background masih terlihat agar memudahkan kita dalam proses seleksi PATH.
4. Panjang Amat Postingannya, Download aja deh File PDFnya.

Hasil dari Seleksi Photo :


Donwload Tutorial PDFnya : Download File
Baca selengkapnya »

Tutorial Photoshop : PSDTuts

0 komentar
Step 1 Langkah 1
Make a new document that is 2000px by 1200px .
Then make a new Gradient Adjustment Layer with a linear gradient that goes from a dark gray (#464646) at the bottom to black (#000000) at the top.

Step 2 Langkah 2
Make another linear Gradient Adjustment Layer above the previous one, and make it a rainbow of colors of your choice.
There are some colorful presets that you can choose from in the gradient palette, or create your own.
Set the layer's Fill down to 25%
Then set the layer's blending mode to Color .

Hahaha, Sok English mah. Tuh Cuma coba2 aja, Download aja filenya, dah ditranslate Bahasa Indonesia kok, insyaallah lumayan jelas. heeheh :)

Hasilnya, Bisa dilihat pada gambar dibawah ini :


Donwload Tutorial PDFnya : Download File
Baca selengkapnya »

Tutorial Photoshop : Make UP

0 komentar
Langkah-langkahnya  :
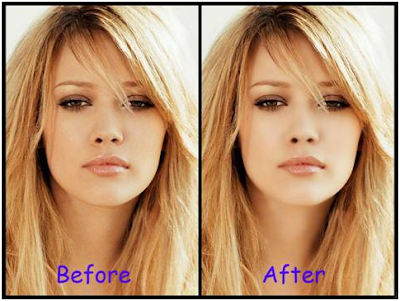
1. Tentu saja buka Photo yang akan di Edit, disini sya menggunakan Photo dari mantan saya yang bernama Hilary Duff

2. Setelah itu Duplicate Layer

3. Klik kanan >> Duplicate Layer... akan muncul doker Windows seperti gambar dibawah ini
4. Setelah terduplikasi, Blur layer tersebut dengan Smart Blur (Filter >> Blur >> Smart Blur )
5. Selanjutnya Download File PDFnya

Hasil dari MAKE UP Dari foto yang diedit :


Donwload Tutorial PDFnya : Download File
Baca selengkapnya »

Tutorial Photoshop : Love Abstrack

1 komentar
Langkah 1
Create a new document.
On the Background layer, double-click to open the Layer Style dialog box and apply the Gradient Overlay with black and green (#9dc5c7).

Step 2 Langkah 2
Create a new layer.
Set white for the foreground and black for the background color.
Set. After that, go to Filter>Render>Clouds.

Step 3 Langkah 3
Change the Blend Mode of the clouds layer to Multiply 60%.
Duplicate the layer and rename it to “radial blur.” After that, go to Filter>Blur>Radial Blur.

Step 4 Langkah 4
Duplicate the background layer and move it up in front of the other layers.
Rename it to “Gradient Light” and go to the Layer Styles dialog box.

Next Step Download

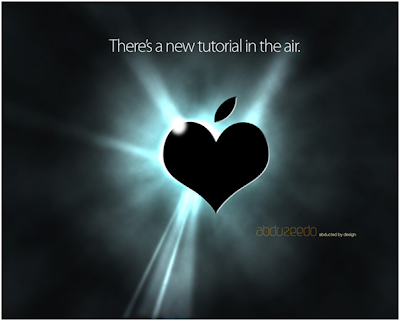
View Image :


Donwload Tutorial PDFnya : Download File
Thanx To : Adbuzeedo.com
Baca selengkapnya »

Tutorial Photoshop : Light Effect

0 komentar
A) Creating a Bokeh Brush
Step 1:
In order to create the bokeh effect, we'll first need to create a bokeh brush. Create a new document 500 X 500 pixels in size and with a transparent background. Then create a perfect circle by selecting the Elliptical Marquee Tool and holding down the Shift key. Fill it with any color.

Step 2:
Go to Edit - Stroke and set the Inside stroke to black 8 px. It will look like this.
Lower the Opacity to 50% to get a more transparent look instead of a solid bokeh brush.

Step 3:
Now that we've created the brush, go to Edit>Define Brush Preset, name your brush "BOKEH" and save it. You can now see the newly created brush in your Brush Panel (Windows - Brushes).
B) Setting the Brush
Step 1:
Change the brush settings to as shown below:
C) Creating Bokeh Effects
Step 1:
Before we start painting our bokeh, let's create a new layer ( 900x900 ) and fill it with a colorful gradient. I created a new layer and used the layer styles (Layer >Layer Style>Blending Options) to do this, but feel free to do it any way you prefer. Here's how my document looks like so far.
Step 2:
Create a new layer and name it Bokeh 1. Select the Brush Tool (B) and set its color as white. Now simply paint some circles with your custom brush. Use a big brush size for this first layer. Then change the Blend Mode to Color Dodge.
After that, go to Filter - Blur - Gaussian Blur. Set to 18 pixels..

Next Step : Download Tutorial PDF

Final Result :


Donwload Tutorial PDFnya : Download File
Thanx To : 123rf.com
Baca selengkapnya »

Tutorial Photoshop : Kertas Lipat

0 komentar
Langkah - Langkahnya:
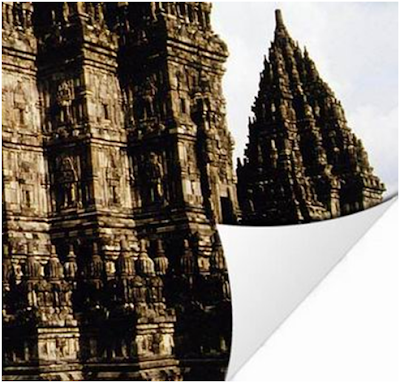
1. Buka Aplikasi Photoshop anda, disini saya menggunakan photoshop cs 4 namun tenang saja karena teknik ini bisa diaplikasikan di semua jenis photoshop (7,CS,CS2,CS3,CS5) Buka Foto atau gambar anda dengan photoshop (File >> Open) Disini saya menggunakan foto candi Prambanan

2. Buat bangun dengan Pen Tool seperti ini,
3. Setelah itu pilih Layer >> Rasterize > Shape
4. Buat elipse dengan Eliptical Marquee Tools

4. Tekan Tombol Delete pada keyboard lalu masuk ke Layer >> Layer Style >> Gradien Overlay... anda bisa mengatur sesuai keinginan namun disini saya mengatur dengan parameter seperti ini,
5. Lalu masuk ke Layer Drop Shadow...

Hasil Gambar yang diedit :

Donwload Tutorial PDFnya : Download File
Thanx To : Ilmugrafis.com
Baca selengkapnya »

Tutorial Photoshop : 3D Text

0 komentar
LANGKAH PERTAMA : MENU > FILE > NEW (CTRL+N)
UKURAN : WIDTH 800 HEIGHT 600

SETELAH LAYER BACKGROUND, BUAT LAYER BARU DENGAN MENGKLIK ICON NEW LAYER YANG BERADA DISUDUT KANAN BAWAH LAYER.

LANGKAH KEDUA : MEMBUAT TEXT “INCLUSTER”

SETELAH ANDA BUAT KLICK KANAN PADA LAYER TEXT LALU PILIH BLENDING OPTION
PADA BLENDING OPTION  DROP SHADOW  BEVEL AND EMBROSS
SETT BEVEL AND EMBROSS : SIZE 250PX SOFTEN 16PX
SELANJUTNYA........

Hasil yang saya buat, hehehhe.. memang kurang bagus sih.. tapi lw untuk pemula lumayanlah.


Download Tutorial PDFnya : Download File
Baca selengkapnya »

Tutorial Photoshop : Girls ANd Fish

0 komentar
The first you open the picture below:
Use Elliptical Marquee Tool to make a selection with Feather=10px like this:
Press Shift+Ctrl+I to inverse the selection
Go to Filter -> Blur -> Radial blur, set something like this:
You will get:
Press Ctrl+M to open Curves, set like this:
The picture looks lighter now
Press Ctrl+U, choose Cyans in Edit part and do as shown below
Press Ctrl+J to duplicate layer, continue to open Hue/Saturation, choose Yellow in Edit part

Create a new layer, choose magenta color: #EC008C, zoom out the picture, use soft brush to decorate the lady's lip, change blend mode of layer to Softlight, opacity 80%

At this state, the result will look like this
Now we are going to retouch the skin of lady, press Ctrl+B to open Color Balance...........

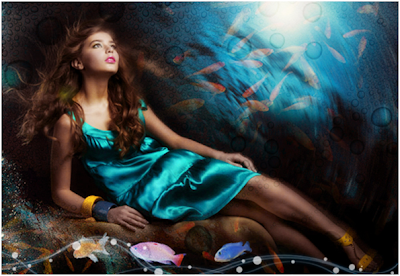
Final Result :


Donwload Tutorial PDFnya : Download File
Baca selengkapnya »

Tutorial Photoshop : Girls Pelangi

0 komentar
Langkah 1

1.Cari gambar yang ingin ditambahkan bias pelangi, Alternatif 1 yaitu sebagai contoh saya menggunakan gambar ini yang bisa kalian download dari ilmugrafis.com

Download
Foto Alternatif ke 2 yaitu dengan menggunakan Foto kamu sendiri atau mencari Foto-Foto Model yang lain dengan menggunakan bantuan Google Services... ketik keyword: Super Models atau Photo Arts

Langkah 2 Buka gambar yang ingin kalian edit dengan PHOTOSHOP Caranya: [Klik kanan] pada gambar lalu pilih "open with" pilih ”Photoshop”

Langkah 3 Tampilkan jendela Layers dengan cara [klik kiri] menu utama di sebelah paling atas "windows" Lalu pilih "Layers" Jika Layer sudah dalam keadaan tercentang maka tidak perlu melakukan langkah di atas karena layers sudah aktif

Langkah 4 Buat duplikat dari Background Layers dengan meng [kilik kanan] palete layer "Background" > Duplikat layers > Ok Hasilnya seperti ini Background terduplikasi


Donwload Tutorial PDFnya : Download File
Thanx To : Ilmugrafis.com
Baca selengkapnya »

Tutorial Photoshop : Abstrack Girls

0 komentar
Langkah 1: Tambahkan J Lapisan Blank Baru
We're going to be adding our light Kami akan menambahkan cahaya kami streaks garis-garis on their own separate layer, so the first thing we need to do is add a new blank layer to our document.
To do that, click on the New Layer icon at the bottom of the Layers palette:

Photoshop Tutorials: Clicking on the "New Layer" icon.
Photoshop Tutorial: Mengklik pada ikon "" New Layer.

This adds a new blank layer, which Photoshop names "Layer 1", above our Background layer:
Step 2: Select The Pen Tool Langkah 2: Pilih Pen Tool
As I mentioned at the beginning, we're going to create our light
To draw paths, we need the Pen Tool , so select it from the Tools palette.
You can also press the letter P to select it with the keyboard shortcut:...


Donwload Tutorial PDFnya : Download File
Thanx To : Photoshopessentials.com
Baca selengkapnya »

Tutorial Photoshop : Change Warna

0 komentar
You must have Javascript enabled in your browser for many of the features to work on this site.
Color your Black and White Photos Easily

Ever watched a Digitally Remastered Film and wondered how they colored in the black and white frames?
I think we all have at some stage and the answer is simple: they painted it frame by frame.
Now I'm not sure to the techniques used in painting film frame by frame, but I can sure help you out with your black and white photographs! Ever had a photograph

you wished was in color? Read on and find out how to color it in using nothing more than the Brush Tool and Curve Adjustments.
Step 1 - Scan your Image and Open up in Photoshop
Scan in your black and white image and open it up in photoshop, or if you're going to be following along with this tutorial (which I assume you are) then you can download our starting image HERE, or click on the image below to be taken to the photographers website:

Step 2 - Create your First Curves Adjustment
With our black and white image on our canvas we're going to go to Layer>New Adjustment Layer>Curves. Name this layer Skin. Now, on the curves Panel (If you can't see it, go to Window>Adjustments) Click the dropdown menu and instead of RGB, Select Red. To create the skin color we're going to Push the slider for Red up slightly, then use the dropdown menu to navigate to Blue, and push the slider down.


Donwload Tutorial PDFnya : Download File
Thank To : WWW.SIRXLEM.DEVIANART.COM
Baca selengkapnya »

Tutorial Photoshop : Fire Girls

0 komentar
1. Bikin new page dulu gan sizenya mah terserah... backroundnya item ya...

2. Lalu buat new layer (Ctrl+Shift+N) lalu klik Brush tool kasih warna orange ya gan... kira2 jadinya kek gmbar dibawah ini

3 Abis ntu... [ Download image ] drag Render image yg ane sertain td gan... lalu potong tangan kanannya buat dikasihin tangan kiri kan g da gan jgn lupa di duplicate ya(Ctrl+J)... sesuain aj udah gan...

4. Trs buang bawahannya yg kepotong td gan... terus flatten deh (Layer >> Flatten Image) tar pasti nyatu tuh... kl udah gitu tinggal drag lg aj/masukin ke page yg pertama kita buat td gan..

5. Maih kerja di layer ini, tekan Ctrl+J gan.. udah gt ubah Blendingnya jd Color trs warnain neh layer pk warna orange kek yg diatas td gan....................


Donwload Tutorial PDFnya : Download File
Thanx To : Ilmugrafis.com
Baca selengkapnya »

Tutorial Photoshop : Effect Tatto

0 komentar
Langkah 1
- Siapkan gambar yang akan di Tatoo Disini saya menggunakan gambar ini yang bisa di download di Efek Tattoo Artis dan Model ilmugrafis dan Gambar Motif Tatoo
- Setelah itu buka kedua gambar dengan adobe Photoshop

Langkah 2
- Gabungkan kedua gambar menjadi satu dengan move tool (gambar tattoo didrag ke gambar Artis)
Jangan Lupa gunakan mode Overlay
- Setelah menyeleksi bagian tangan gunakan inverse untuk membalikkan seleksi ke luar daerah tangan si Artis kemudian pindah ke layer 4 (tatoo) dan tekan tombol DEL pada keyboard- Gunakan Selection Tool untuk menyeleksi bagian tangan


Donwload Tutorial PDFnya : Download File
Thanx To : Ilmugrafis.com
Baca selengkapnya »

Tutorial Photoshop : Effect Salju

0 komentar
Here's how it will look once we've added in our falling snow effect:
Langkah 1: Tambahkan J Lapisan Blank Baru
To begin, let's add a new blank layer above our photo.
Untuk memulai, mari kita menambahkan lapisan kosong baru di atas foto kita.
If we look in our Layers palette, we can see that our photo is sitting on the Background layer, which is currently the only layer we have.
Jika kita lihat dalam palet Layers kita, kita dapat melihat bahwa foto kita duduk pada lapisan latar belakang, yang saat ini lapisan-satunya yang kami miliki.
Click on the New Layer icon at the bottom of the Layers palette.
Klik ikon New Layer di bagian bawah palet.
It's the icon second from the right, beside the Trash Bin:

Photoshop Photo Effects: Click on the New Layer icon at the bottom of the Layers palette. Photoshop Foto Efek: Klik ikon New Layer di bagian bawah palet.
Nothing will seem to have happened in the document window since the layer we just added has nothing on it yet, but if we look again in the Layers palette, we can see that we now have a new blank layer, which Photoshop has automatically named "Layer 1" for us, sitting directly above the Background layer:
Tidak akan tampak telah terjadi di jendela dokumen sejak lapisan kami hanya menambahkan tidak ada di atasnya, tapi jika kita melihat lagi dalam palet Layers, kita dapat melihat bahwa kami sekarang memiliki lapisan kosong yang baru, yang bernama Photoshop secara otomatis " Layer 1 "untuk kami, duduk tepat di atas lapisan Latar Belakang:


Donwload Tutorial PDFnya : Download File
Baca selengkapnya »

Tutorial Photoshop : Effect Warna

0 komentar
Preparations: Persiapan:
We will need a nice model image and some vector curves. Kita akan membutuhkan gambar model bagus dan beberapa kurva vektor.
There are plenty to be found at Vecteezy and here is where I got mine.
Ada banyak dapat ditemukan di Vecteezy dan di sini adalah di mana saya punya tambang.
All rights of these resources belong to their respective owners.

Semua hak sumber daya milik masing-masing pemilik.
Step 1 – Setting Up Background: Langkah 1 - Menyiapkan Latar Belakang:
Create a document of size 750 by 550px.
Buat dokumen ukuran 750 dengan 550px.
Set your foreground color to #505050 and background color to #000000.
Set warna foreground Anda ke # 505050 dan warna latar belakang # 000000.
Drag a Radial Gradient at the position shown in the diagram. Tarik sebuah Gradient Radial di posisi yang ditunjukkan di diagram.
Step 2 – Cropping the Model: Langkah 2 - Tanam Model:
Crop out the model with Pen tool.
Tanaman keluar model dengan alat Pen.
You can check out this post to find out how.
Anda dapat memeriksa posting ini untuk mengetahui caranya. Go to Image > Adjustments > Levels to tone it darker.
Pergi ke Image> Adjustments> Levels untuk nada itu lebih


Donwload Tutorial PDFnya : Download File
Baca selengkapnya »

Tutorial Photoshop : Membuat Effect Pelangi

0 komentar
And here's the same image with a double rainbow added, which is the effect we're after:
Dan inilah gambar yang sama dengan pelangi ganda menambahkan, yang merupakan efek yang kami cari:

Langkah 1: Tambahkan A New Layer Above The Layer Latar Belakang
With the image open in Photoshop, if we look over in the Layers palette, we can see that we currently have one layer, the Background layer, which contains our image:
Dengan gambar terbuka di Photoshop, jika kita melihat lebih dalam palet Layers, kita dapat melihat bahwa kami saat ini memiliki satu lapisan, latar belakang lapisan, yang berisi gambar kami:

The Layers palette showing the Background layer.
Palet Layers menunjukkan latar belakang lapisan.
The first thing we need to do is add a new blank layer above the Background layer.
Hal pertama yang perlu kita lakukan adalah menambahkan lapisan kosong baru diatas layer Background.
To do that, click on the New Layer icon at the bottom of the Layers palette:
Untuk melakukannya, klik pada icon New Layer di bagian bawah palet Layers:

Click the "New Layer" icon at the bottom of the Layers palette.
Klik tombol "New Layer" icon di bagian bawah palet.
Photoshop will add a new blank layer above the Background layer and will name it "Layer 1".
Photoshop akan menambahkan lapisan kosong baru di atas lapisan Latar belakang dan akan nama itu "Layer 1".
Double-click directly on the name of the layer and rename it to "Rainbow", since we'll be using this layer to add our rainbow:
Double-klik langsung pada nama layer dan ganti namanya menjadi "Rainbow", karena kita akan menggunakan lapisan ini untuk menambahkan pelangi kami: ..... Next download


Donwload Tutorial PDFnya : Download File
Baca selengkapnya »

Tutorial Photoshop : Effect Photo Strrip

0 komentar
1. Lakukan Crop Tahap pertama-tama kita melakukan cropping Klik dan tarik kea rah diagonal berlawanan

2. Duplikasi Layer Lakukan Duplikasi layer dengan menekan Ctrl+J sebanyak 2x.Dan ubah nama layer menjadi Vertical dan Horizontal.

3. Ganti warna Background Penggantian warna Background kita lakukan dengan menekan Alt+Backspace. Pastikan layer yg aktif adalah layer Background. Warna yang kita pakai adalah warna dasar gambarnya. Pengambilan warna dengan Pick color tool. Untuk menghidden layer.hilangkan gambar mata pada Layer Vertical, dengan mengklik gambar matanya

4. Aktifkan Grid Untuk mengaktifkan photoshop Grid, tekan Ctrl+’ Setelah muncul, kita mengatur jarak atau besar dari Grid. Tekan Ctrl+K,atur komposisi warna dan jarak seperti gambar. Pilih Guides, Grid, Slice. Dan gridline menjadi 10, klik OK


Donwload Tutorial PDFnya : Download File
Thanx To : Ilmugrafis.com
Baca selengkapnya »

Tutorial Photoshop : Effect Photo Pecah

0 komentar
Sebelumnya silahkan Download Brush-nya Disini Download brush (http://www.4shared.com/file/126150891/490100a6/41_Grunge_Brushes___PS7_by_KeepWaiting.html)
1. Buka Image gan, saya gunakan mantan saya disini ^_^V Devon Aoki

2. Setelah terbuka, Duplikatkan image background atau image pertama tadi atau tekan Ctrl+J

3. Setelah itu kembali ke layer background, lalu gunakan Clone Tool, tutupi sebagian gambar Devon
Lalu gunakan Heal Tool untuk memperhalus Cloningan tadi

4. Kembali lagi ke Layer 1, lalu buat New Layer
5. Load brush yg sudah di Download tadi dengan cara mereplacenya, lalu brows dimana anda meletakkan/menyimpan brush tadi.


Donwload Tutorial PDFnya : Download File
Thanx To : Ilmugrafis.com
Baca selengkapnya »

Tutorial Photoshop : Membuat Effect Photo Menjadi Banyak

0 komentar
Langkah 1: Duplikasi Layer Latar Belakang
The first thing we need to do for this effect is duplicate our Background layer.
Hal pertama yang perlu kita lakukan untuk efek yang sama lapisan Latar kami.
With our image open in Photoshop, we can see in the Layers palette that we currently have just one layer, the Background layer, which contains our original image:
Dengan gambar yang terbuka di Photoshop, kita dapat lihat dalam palet Layers bahwa kami saat ini hanya memiliki satu lapisan, latar belakang lapisan, yang berisi gambar asli kami:

The Layers palette in Photoshop showing the original Background layer.
Palet Layers di Photoshop menunjukkan Latar lapisan asli.
To quickly duplicate the layer, use the keyboard shortcut Ctrl+J (Win) / Command+J (Mac).
Untuk cepat duplikat layer, menggunakan cara pintas keyboard Ctrl + J (Win) / Command + J (Mac). Photoshop creates a copy of the Background layer for us, names it "Layer 1", and places it above our Background layer in the Layers palette:
Photoshop membuat copy dari lapisan Latar Belakang bagi kita, nama-nama itu "Layer 1", dan tempat-tempat itu di atas lapisan Latar kami di palet Layers:

The Layers palette now showing the copy of our Background layer above the original.
Palet Layers sekarang menunjukkan salinan kami Latar lapisan atas yang asli.

Step 2: Add A New Blank Layer Between The Two Layers
Langkah 2: Tambahkan J Lapisan Blank Baru Antara Dua Lapisan
Next, we need to add a new blank layer between our Background layer and the copy of it that we just created. S
elanjutnya, kita perlu menambahkan lapisan baru kosong antara lapisan kami dan Latar copy yang baru saja kita buat.

Currently the copy is selected in the Layers palette (we can tell the layer is selected because it's highlighted in blue).
Saat ini salinan dipilih pada palet Layers (dapat kami kirim layer dipilih karena disorot dengan warna biru).
Normally when we add a new layer, Photoshop places the new layer above the layer that's currently selected, but we want our new layer below "Layer 1", not above it.
Biasanya, bila kita menambahkan lapisan baru, Photoshop tempat lapisan baru di atas lapisan yang saat ini dipilih, tapi kami ingin layer baru kami di bawah ini "Layer 1", bukan di atasnya.


Donwload Tutorial PDFnya : Download File
Baca selengkapnya »
 

Label

Abstrack (33) INCLUSTER (49) Pariwisata (5) photo (9) Photographer (1) Photoshop (58) Point Blank (4)

Pengikut

Statistik

© 2010 Incluster | Photography Design by Dzignine
In Collaboration with Edde SandsPingLebanese Girls